Table Of Content

Gradually darken the overall drawing until you create a good balance between the various areas of the hair. Be sure to keep the strokes in the light and mid tone ares visible by leaving some distance between them. The main goal of this step is to apply an initial layer of shading that will define the light, medium and dark areas of the hair.
Section 1.- The head and hairline
To bring out highlights, flatten your kneaded eraser and swipe it in the desired direction. The eraser will become too dirty after the first swipe, so fold it in and flatten after each stroke. Explosive —but not too much, curly hair is voluminous, hard to control and, many times, hard to comb! Fluffy, soft, playful and gorgeous, those are some adjectives we can think about for curly hair. Textures save time and add complexity to the shapes.
Step 19: Draw loose hairs
Gently outline the hair without drawing lines that are too thick. In this case it will also be the outline of the whole haircut. Draw the direction of the hair gently flowing down over the shoulders. Keep in mind that you're not drawing the single hairs here, just their flow. Continue building up the tones, blending in more lights and more darks. The darkest tone will be the blackest that you can even use the black pencil and the white pencil for much more contrast.
Tips for Drawing Digital Anime Line Art!
Starting at the hairline, sketch a line to indicate the parting of the hair (whether it is in the center or to the side). Next, sketch several thick, long locks of hair extending from the top of the head to the shoulders (or wherever you prefer). This can be anywhere (left, right, center), but it may help to look at a couple of photo references first.
6 Best Hairstyles for Round Faces, According to Hairstylists - Real Simple
6 Best Hairstyles for Round Faces, According to Hairstylists.
Posted: Mon, 19 Jun 2023 07:00:00 GMT [source]
Notice the dark areas and the light areas in the hair. Instead, concentrate only on shapes and the value within them. Once we have a good understanding of the light, we can begin developing the texture and value of the hair. The directional strokes that are used should flow along the form of each collection of hairs.
How to Draw Different Kinds of Hair: Short, Long, Straight, Wavy, and Curly
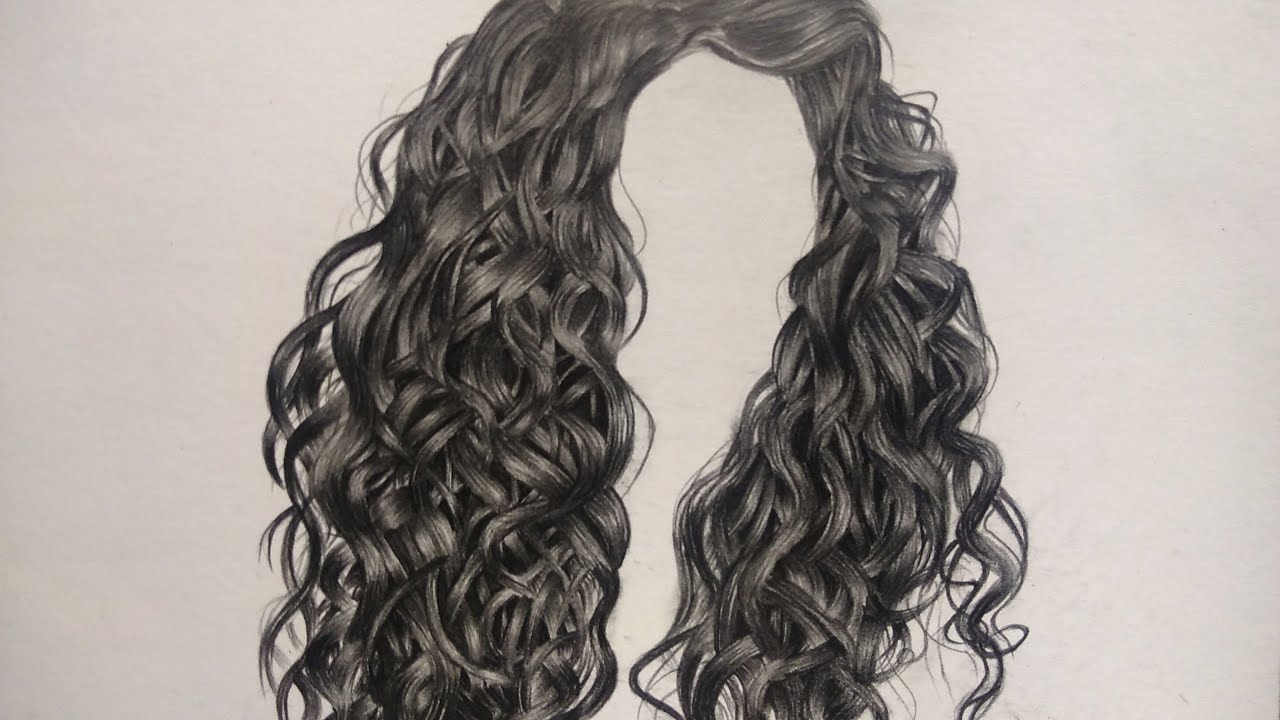
With curly hair, the collections are smaller and more compact. Since the hair is curly, the directional strokes that we make for each "clump" should also curve just as the hair does. Well, the results may be different, but the thought process is the same. We'll still need to start with the overall shape of the hair. Curly hair tends to have more stray hairs that find their way outside the confines of the general shape. For this reason, we'll concentrate on drawing the shape without all of the stray hairs.

How to Draw Hair from Real-Life Reference
For example, areas that lie below other sections of hair will not be exposed to as much light and will therefore be darker. Remember to keep your pen strokes light, only occasionally switching to heavier strokes in the darkest parts. Divide this hairstyle into several curly locks of hair by drawing the same bouncy line as before as many times as needed.
How to Draw Skeleton Hands – Anatomical Hand Bones Sketch
From here, we can look for the relationships of values. Doing this may make the shapes of lighter and darker value stand out a bit more. The four step approach that we explored above can also be used for a single lock of hair... You may start by taking a photo of someone's hair - perhaps your own. Look for a defined collection hair that forms a shape. We understand forms because of the manner in which light interacts and behaves on them.
Step 12
The curls are created by this little twisting motion. Take care to add a bit more pressure to your strokes when you draw these twists. Pressure should only be applied close to the regions of the hair where they intersect. It’s crucial to remember that where these sections of hair overlap they cast shadows, so we have to work harder to get that impression. Every time we sketch the hairs emerging from a darker area, soften your stroke. Consider it a fading effect produced by lessening the pressure applied to the pen.
You can't simply draw all the hairs in the form of lines, because that's not what we see when we look at hair. What we see must be simplified to lines and shades, and there are many ways to do it. Blend in the strands, creating strokes in the same direction the hair grows. Now take your B or 2B pencil, and shade in the dark areas of the hair that you can see yourself. Continue gradually increasing the lightness and the darkness. It is best to learn this technique by watching some YouTube tutorials.
All of the examples in this tutorial will use fairly generic lighting with no particularly strong one directional light source. The other styles have shortened instructions to avoid repetition. Afro-textured hair has a lot of curly strands and texture.
Drawing curly hair might seem to be the most daunting to do. Especially if it feels like there are too many of them, curls. And then use the multiply layer trick on the hair in the back, and you're pretty much done! I like to use a colour that's slightly shifted on the colour wheel.
Close the shape of each strand by mirroring its wave and adding a pointed tip. Shade the hair now, thinking in terms of strands, not single hairs. Outline the whole hair, following the rhythm of strands. Don't press too hard—hair is soft and shouldn't have a hard outline.
You can erase the construction lines as you go through them. Similar to the first example begin by drawing the main shape of the hair with the largest details over top of the head/hairline. Refine the shading by creating smoother gradients between the mid tone, light and “in shadow” areas of the hair. You can also make the shadow areas slightly darker.
I'm very roughly following my sketch – it doesn't need to be perfect! The mapping pen has a pretty good stabilization so the lines are pretty smooth. You can turn up the stabilizer or make quicker strokes if it doesn't feel smooth enough. After this, the volume of the hair compared to the head shape is more noticeable. Once we have the main body of the hair developed, we can go back and add those stray hairs.
Make sure to fill it all and to make some of the curls noticeable outside of the hair shape. It has to do a lot with the shape of the head and the position and type of hairline. Be sure to start drawing with very light lines as you will need to erase parts of it in some of the steps. Light lines will also make it much easier to correct mistakes. The lines in the examples have been made slightly darker just so that they are easier to see. This tutorial shows how to draw female hair with three different hairstyle variations including natural looking, straight and curly hair.


No comments:
Post a Comment